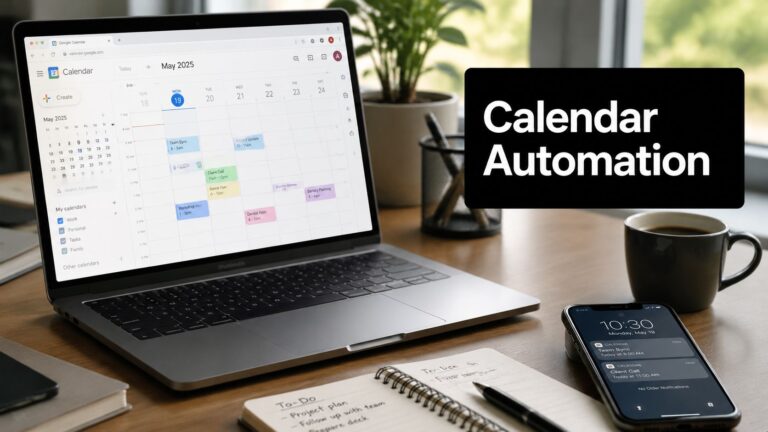
On the outside, Google Calendar may look like any other plain old calendar. But dig a little deeper and you’ll unearth a wealth of features and functions. You’ll be amazed at how organized your work and personal life can be with the Google Calendar. To make the best use of it, read the following Google Calendar hacks and see how your productivity soars!
1. Creating A New Calendar For Better Organization.
When you start using a Google account and GSuite, you automatically have a Google calendar with your name on it, which is your primary calendar. You just need to go to calendar.google.com to view your calendar.
You can add a new calendar to your primary one so that you can keep your work and personal events and activities separate and better organized. Here’s how you can add a new calendar.
Step 1: Go to calendar.google.com

Step 2: Scroll down the left menu bar and under Other calendars, click on the + sign.

Step 3: Choose Create new calendar from the list.

Step 4: Give a name to the new calendar and click the Create calendar blue button below.

Step 5: You will see a message when your new calendar has been created.

Step 6: Press the back arrow beside Settings on the top-left corner of the window to go back to your Google calendar page. You will find the new calendar added to the list.

2. Scheduling Meetings With Find A Time.
Finding it difficult to set a meeting when all concerned have a free schedule? Make it simple with google calendar hacks! Instead of sending out separate mails to everyone, trying to get a free slot, you can do it right from your google calendar. There are two ways of scheduling a meeting when everyone is free – either with Find a time or Suggested times option. Just follow the steps below for using the first option.
Step 1: Create an event on your calendar by clicking on a time, adding the name of the event, and clicking the Save button on the bottom right.

Step 2: Click on the event and select the edit icon.
Step 3: Add meeting attendees by clicking on the Add guests field.

Step 4: Click the tab Find a time beside Event details.

Step 5: You can view your calendar along with the intended attendees’. When you see an empty slot, click on it and then click the blue Save button on top.

Step 6: Click on the Send button if you want the attendee to get a meeting request on their email.

Alternatively, you can use the Suggested times feature to pick a suitable meeting time for all. Here’s how to do it:
Step 1: After you have added the attendees’ names on the Add guests part of the event, click on the Suggested Times option below the names.

Step 2: When you click on the Suggested Times option, a drop-down list will show all the time slots when all the attendees are free.

3. Setting Events To Private For Confidentiality.
There may be confidentiality issues when you set meetings on the Google calendar. Therefore, you may have to hide event details. Whoever has access to your calendar will be able to see the event but not the details. Here’s what you need to do to put your events in a private mode.
Step 1: Click the calendar event and click on the edit icon.
Step 2: Click on the Default visibility tab beside Busy, choose the Private option, and click the Save button on top.

4. Setting Remote Meetings With Hangout.
You may need to meet your team remotely often, especially in the pandemic situation. There’s a super-easy way of setting up a remote meeting – one of the many Google calendar hacks.
Step 1: Click on the calendar event and click the edit icon.
Step 2: Click on the Add Google Meet video conferencing button and a link will be automatically added to the event.

5. Attaching Reference Docs.
To prevent an inefficient meeting, one of the important things is to share the agenda or any other reference document with the attendees. If you use google calendar, you can send an attachment without having to mail it separately. This is how you can do it.
Step 1: Edit by clicking on the event in google calendar and the edit icon.
Step 2: Click on the Add attachment icon of a paper clip.

Step 3: Select a file from your Drive or upload from your computer.

6. Setting Time Zones With World Clock.
With the nature of work changing along with technology, it’s not unusual to have colleagues working in different time zones. So, when you schedule a meeting through a google calendar event, make sure you have the world clock setting the right time zone. To do so, follow the steps below.
Step 1: Head over to your google calendar and click on the Setting wheel on the top right corner and choose Settings.

Step 2: From the left menu bar, under General, choose World clock. Make sure to check the box beside the Show world clock option. Click on the Add time zone option to view these on the left panel of your google calendar.


7. Setting Working Hours For Convenient Scheduling.
Another benefit if you use google calendar is that you can set your working hours. So, if anyone wants to schedule a meeting with you outside your work hours, they would get an alert that it’s not a suitable time for you. To set your working hours on google calendar, here’s what you need to do.
Step 1: From your google calendar view, click on the Settings wheel on the top-right side and click settings.

Step 2: From the left menu bar, under General, select Working hours.

Step 3: Now set your working days and hours on google calendar by clicking on each field and adjusting the values.

8. Emailing Guests From A Calendar Event.
If you want to update the attendees regarding a meeting, you can do it directly from the google calendar by following the steps mentioned below.
Step 1: Click on the google calendar event and click the edit icon.
Step 2: From the right panel, click on the envelope icon where the guests’ names are listed.

Step 3: An email message window will open for you to add a subject line and a message. Click on the Send button to email to all the attendees at one go.

9. Setting Meeting Locations For Flawless Logistics.
Have you ever been in a situation where time was wasted as there was confusion about the meeting venue? With google calendar, there’s no chance of missing a meeting location as it allows you to set a location when you schedule a meeting on your calendar. This is how you can do it.
Step 1: Click on the meeting on your google calendar and select the edit icon.
Step 2: Click on the Add location field and start to type in the meeting venue address. There will be a drop-down menu with a list of venues to choose from. Choose your meeting location and click the Save button on top.


10. Setting Optional Attendees To A Meeting.
Sometimes, you may schedule a meeting on your google calendar and make it optional for some of your teammates to attend. In such a case, you can mark them as optional by following the steps below.
Step 1: Click on the google calendar event and select the edit icon to edit.
Step 2: On the right panel where the meeting guest list can be seen, hover over the individual name and select the Mark optional icon. Click again if you want the optional status to be changed back to mandatory. Click the Save button on top.

11. Desktop Notifications For Reminding.
If you get a notification dominating your entire computer screen ten minutes before a calendar event is due, you can manage it better by setting a desktop notification. This will enable the reminder to be less intrusive and more polite, so to speak!
Step 1: Click on the Settings gear on the top-right corner of your Google calendar view.

Step 2: From the left panel under General, go to Event settings. Go to Notifications.

Step 3: Click on the down arrow beside Notifications and select Desktop notifications.

12. Notification Time Changing For Your Convenience.
Closely related to setting desktop notifications is the timing of the notification that you want to receive before the calendar event. By default, it’s ten minutes before the event that you receive a notification. But to change this time, follow the steps below:
Step 1: Click on the event from your google calendar view and click the edit icon.
Step 2: Locate the bell icon from the left panel and click on the 10 beside the Notification tab. Then adjust the time by toggling the up and down arrows. Finish by clicking the Save button on top.
In the same way, you can change the minutes by clicking on it and changing it to hours, days, or weeks. This may be useful for important events like annual meetings for which you would like to receive a notification well in advance. Just remember to click the Save button on top after you have set the timing for event notifications.

13. Blocking Meeting Times For Less Work Interruption.
If you’re inundated with meeting requests scattered all over your calendar view, it’s time for you to create appointment slots and share these with people who want to have a meeting with you. Having meetings throughout the day or the week at various times can interrupt your work flow like anything. So, take more control over your schedule by setting appointment blocks on google calendar. It’s only during those blocks that someone can make an appointment with you. To do so, here’s what you need to do.
Step 1: Click on any time slot in your google calendar view and when the window for adding event details appears, click on Appointment slots. Adjust the date range by clicking on the month and times.

Step 2: Adjust the meeting slot duration by using the up and down arrows beside 30 and clicking the Save button once done. The appointment slot is set for 30 minutes by default.

Step 3: For getting the link to the appointment slots on your calendar, click on the More options button beside the Save button.

Step 4: Under Event Details, click on the hyperlink This calendar’s appointment page. It will take you to another page from where you can copy the link and share it with those who wanted to have a meeting with you. They can click on the link and choose a time slot with you.


14. Adding Calendars Of Interest.
If you’re working across borders and continents, it pays to know the national holidays of your colleagues working in another country. Or, you may be a sports fan and want to know which dates coincide with the games of your favorite basketball team. You may also be interested in knowing religious holidays as you may be working with a diverse team. So, here’s how you can add calendars of interest to the google calendar view.
Step 1: Go to google calendar view from your computer.

Step 2: Go to the Settings wheel on the top-right side and choose Settings.

Step 3: From the left menu bar, under Add calendar, choose Browse calendars of interest.

Step 4: From the list, check the box beside the calendar that you want to add to your calendar. Click the back arrow beside the Settings on the top-left corner of the screen to go back to the calendar.

15. Custom View Your Calendar.
You can change the view of your calendar to show daily, weekly, monthly, or even custom views. Included is the option to show declined events.

To custom view your calendar, go to the Settings wheel from your calendar and click on Settings.

From the left panel, click on View options and adjust the settings by checking or unchecking the boxes beside the different options.

16. Share Google Calendar For Team Collaboration.
When you are working in a team, it’s important to keep everyone updated about projects and work tracking. The easiest way to do it is by maintaining your calendar daily by logging in your work and the start and end times. It makes it easy for your supervisor to track work and make a fair evaluation of your efforts. To share your google calendar, follow the steps below.
Step 1: Go to your Google calendar and from the left panel, hover over the calendar with your name on it, and click on the three vertical dots.

Step 2: Click on the Settings and sharing from the pop-up window.

Step 3: From the left panel, click on Access permissions. You can make the calendar public so that anyone can access your calendar. Or you can choose to grant access to your company only. Another option is to share your calendar with other apps.

Step 4: Go to Share with specific people just below the Access permissions on the left menu bar. Here you can choose specific people who can access your calendar along with the level of access you want to grant to them.

17. Keyboard Shortcuts For Streamlining.
With keyboard shortcuts, you can save a bit of time by editing and managing your google calendar faster. The following keyboard shortcuts will come in handy.
- c – to create a new event on your Google calendar.
- e – to edit details on a Google calendar event.
- Delete or backspace – delete a Google calendar event.
- z or Ctrl + Z – undo last action on Google calendar (may not be possible always).
- k or p – go back to the last time period on your Google calendar.
- j or n – go to the next time period on your Google calendar.
- r – to refresh the Google calendar page.
- t – to view today’s page on Google calendar.
- 1 or d – to look at the day view of Google calendar.
- 2 or w – to look at the week’s view on Google calendar.
- 3 or m – to look at the month’s view of your Google calendar.
- 4 or x – to see a custom view of your google calendar.
- 5 or a – to view the agenda on your google calendar.
- / – to search any event on the google calendar.
- q – to quick add an event in google calendar.
- Ctrl + P or Command + P – to print your Google calendar.
- s – to go to the Google calendar settings.
- ? – to go to the menu of keyboard shortcuts of your Google calendar.
- g – to go to the date of your google calendar.
18. Integrating With Other Apps And Tools
A big advantage of using Google calendar is that it can be integrated with other apps like Apple calendar and a wide range of productivity and communication tools like Zapier, TimeTackle, Calendar, Slack, etc.
19. Easily Drag And Drop Events.
To move a calendar event from one date to another, simply drag and drop it on the desired date. No need to create a new event in your google calendar from scratch.
20. Voice Technology To Add Events.
To create a new event on your calendar while traveling, you can simply use the voice technology in your smart device to add a calendar event. When you address Siri or Google assistant and share details of the event like date, time, and location, all these would be added to your calendar.
21. Color-Code Calendars For Categorization.
You can color-code the different calendars for a clear demarcation between your personal and work calendars. So, to add colors, here’s what you need to do.
From the google calendar page, scroll down the left panel where you have the list of calendars under My calendars and Other calendars. Just hover over the calendar for which you want to change the color, click on the three vertical dots, and choose a color from the palette given. For example, you could pick red for the work calendar, green for personal calendar, yellow for the birthday calendar, and so on.

When you want to label events on your calendar, the easiest way to do it is by color-coding. It’s similar to using post-its of different colors to categorize or label your events for better organization and easy viewing. Just right-click on the event on your calendar and pick a color you like from the palette.

22. Adding Your Google Calendar To Your Website.
If you’re in a business where customers need to make appointments with you often, then adding your google calendar to your website is a great way to save time. Your customers can schedule a meeting with you directly on your website on your calendar. To embed your google calendar on your website, follow the below instructions.
Step 1: Go to calendar.google.com and click on the Settings cog and select Settings.

Step 2: Scroll down the left panel, choose the calendar that you want to embed, and choose Integrate calendar from the list of options.

Step 3: Click on the Embed code field and copy the link and paste it on your website.

23. Getting Your Daily Agenda In Your inbox.
Wouldn’t it be wonderful if you got your daily agenda from your google calendar emailed to you every morning! You would be all set to face the day, knowing what’s ahead. Google calendar can do this for you so that you get the daily agenda every morning at 5 am. Here’s how to set up the daily agenda email notification on your calendar.
Step 1: Click on the settings from the Settings gear of your calendar.

Step 2: From the left panel under Settings for my calendars, click on Other notifications, click on the down arrow beside Daily agenda, and select E-mail to receive the daily agenda.

24. Adding Tasks On Calendar For Prioritization.
Google Tasks is a useful tool for better organizing and can be used on your google calendar. When you want to add a breakdown of tasks and sub-tasks on your calendar, just head over to the right side of the screen and click on the Tasks icon.

Add a task with a date and time if you want a deadline attached and add sub-tasks as the breakdown of the main task.

25. Adding Events From Gmail For Better Coordination.
If you have booked a flight or hotel accommodation and these reservations are in your Gmail, they will be added automatically to your calendar. One of the google calendar hacks that’s very basic but super-useful.
26. Offline Viewing Of Google Calendar.
If you’re away from the Internet or vacationing on an island with no network, you can still view your google calendar in the offline mode from the app on your smartphone. However, any changes you make to your calendar will not be synced until you’re back online.
27. Setting Up Recurring And All-Day Events.
If you have weekly status update meetings, there’s no way to forget them as you can set this as a recurring meeting on your calendar. Similarly, if you have events like a conference or an annual general meeting in your schedule, these can be booked as all-day events on the google calendar.
For example, if you have a team meeting every Thursday at 8 pm, create the event on your calendar and click the edit icon.

Click on the Does not repeat option to get the dropdown list and choose Weekly on Thursday. Click the Save button on top and you will have the recurring event set on your calendar.

Besides the Does not repeat option, there is an All-day option. Just check the box beside it when you want to mark an event as an all-day one.

28. Getting Back Deleted Events.
Simply click on the Settings gear on your google calendar, click on Trash, and check the box beside the events that you want to restore on the calendar.


29. Out-Of-Office Message Setting.
With the significant development in AI, it’s no surprise that the words you enter in your calendar can be turned into an out-of-office message. This sends an alert to anyone who wants to schedule a meeting with you while you’re away. For example, just click on a date in the calendar and type in Vacation.

When you click on the Save button, a window with a message will appear asking you to confirm if existing and new meetings would be automatically declined during these days or hours. Click on Save & decline to set the out-of-office message.

30. Changing The Owner Of A Calendar Event.
You may need to go out on an emergency or you may no longer be the organizer of the calendar event you created. You can change the owner of the calendar by following the steps below.
Step 1: Click on the calendar event and select the edit icon.
Step 2: Beside the meeting name, click on the More actions tab, and choose the Change owner option.

Step 3: From the drop-down menu, choose the name of the new owner of the calendar event. Finish by clicking the Save button on top.

31. Viewing A Block Of Dates.
If you want to view a block of dates from Google calendar, just click and drag the dates from the calendar widget on the left side.

32. Viewing A List Of Events With Schedule View.
You may want to see a list of your calendar events to check out all that’s on your plate over the next few days. In that case, use the Schedule view by clicking on the Day option on the right-hand side, beside the Settings gear.
33. Duplicating Events To Save Time.
You can save time by duplicating an event on your google calendar instead of creating the same event again and again.
Click on the desired event and click the edit icon.
Click the More actions tab and choose Duplicate from the drop down menu. Click the Save button to finish.

34. Hiding The Side Panel For Better Focus.
When you want to focus better on the google calendar, just click the hamburger icon on the top-left corner of the window. The side panel will be hidden. To get it back, just click on the three horizontal lines again.


35. Using The Search Bar To Locate An Event.
If you want to look for an event on your google calendar, just use the search bar on top and type in any word you can remember from the event. It will show the search results containing the word you typed.


Also read on “Ten Things To Do With Your Google Calendar Data”